In an era where sports are streamed rather than broadcast, being able to record live-streamed sports events has become essential for analysts, content creators, and dedicated fans alike. Whether you’re tracking performance trends, creating highlight reels, or simply preserving a memorable match, recording the action from streaming platforms requires careful setup, efficient software, and responsible use.
This guide will take you through a complete, step-by-step process — from organizing your desktop to editing and archiving — featuring the highly capable iTop Screen Recorder as the central tool.
1. Preparing Your Desktop for a Seamless Recording
Before diving into software setup, you need a smooth and distraction-free environment. Recording live video places demands on your computer, and proper desktop organization ensures system stability and clean visuals.
Clear and Organize Your Workspace
Begin by decluttering your desktop. Move unnecessary files and shortcuts into folders. A clean interface helps your recorder run without distractions and looks more professional if you share clips later.
Close Background Applications
Live-streaming and recording simultaneously consume CPU and memory resources. Close unused apps, browser tabs, and heavy background software such as cloud backups or updaters. This helps prevent frame drops, lag, or sudden interruptions during gameplay.
Monitor System Resources
Open Task Manager (Windows) or Activity Monitor (macOS) to check CPU and GPU usage. Ensure you have ample capacity for encoding video. For long sessions, plug your device into a power source and disable sleep mode to prevent automatic shutdowns.
2. Selecting and Configuring the Recording Tool
With your system prepared, the next critical step is choosing reliable recording software. Here, iTop Screen Recorder stands out for its balance of simplicity, performance, and functionality tailored to high-quality live-stream captures.
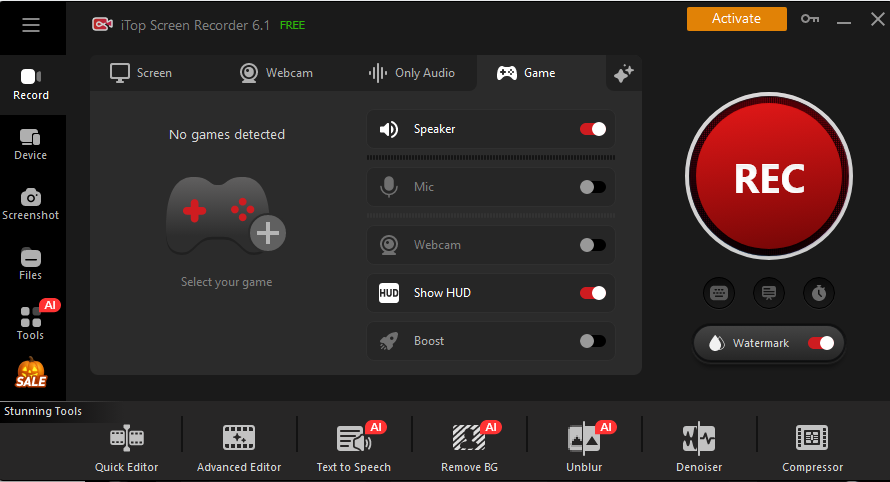
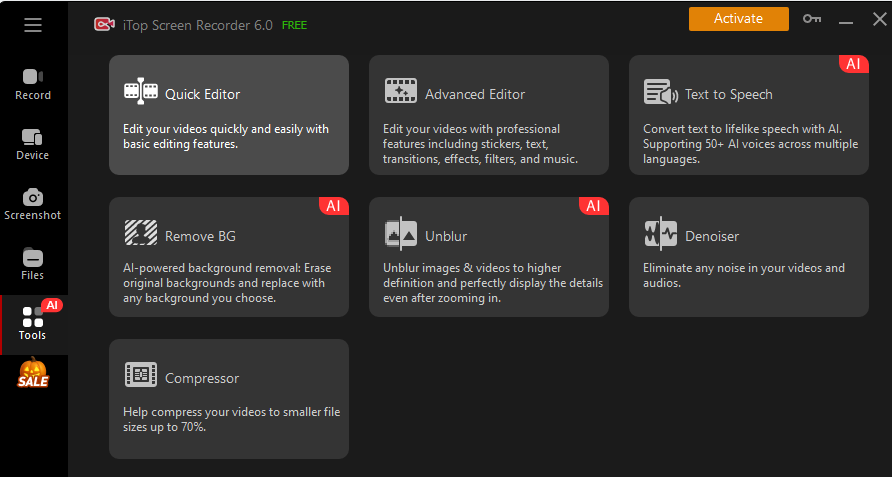
Why Choose iTop Screen Recorder
iTop Screen Recorder supports the following features:
- 1080p and 4K HD recording without lag
- Custom screen region selection
- Take high-quality screenshots on your desktop seamlessly
- Video editing and compression tools
- Relive the magic of AI Text to Speech, Voice Changer and more tools
These features make it particularly useful for sports recordings, where timing, clarity, and reliability are crucial.
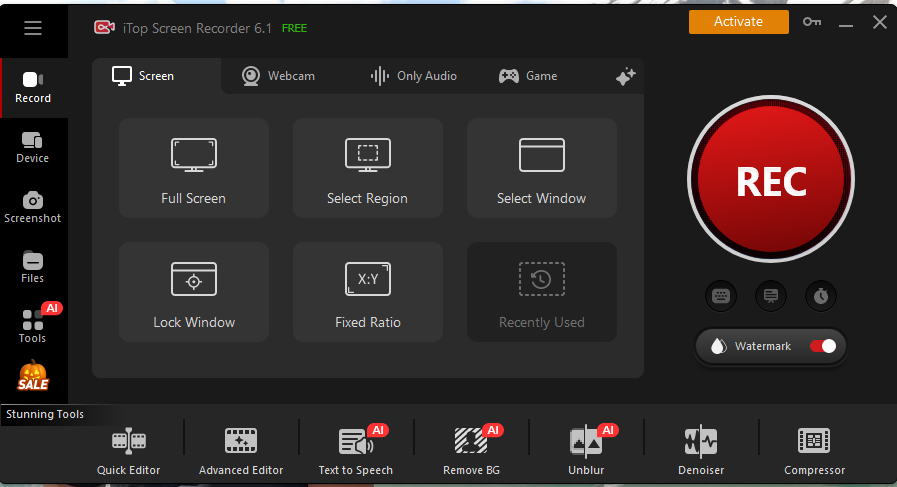
Installation and Setup
Download iTop Screen Recorder from iTop official site, install it, and check for updates. Launch the app, and take a moment to familiarize yourself with its user interface. You’ll notice options to select a screen region, choose input devices, and define output formats.
Adjust Key Recording Settings
Fine-tuning your configuration ensures the best balance between quality and performance:
- Recording Region: Choose Select Window to capture the streaming window (e.g., dobberhockey.com) or Full Screen if you want the entire display.
- Frame Rate: Set to 60 fps for sports events to maintain fluid motion.
- Resolution: Match your stream (1080p or higher for modern broadcasts).
- Audio Source: Enable System Sound to record live commentary and ambient audio; optionally add Microphone for your own narration.
- Output Format: MP4 or AVI is ideal for compatibility.
- File Storage: Choose a fast SSD location with at least several gigabytes of free space.
Run a Test Capture
Before the main event, perform a short 2-minute test recording. Check for:
- Audio synchronization
- Video clarity and smoothness
- Absence of “black screen” errors (iTop Screen Recorder supports “Record Streaming Videos Without Black Screen”)
Make necessary adjustments based on your test. This step ensures flawless capture when the live game begins.
3. Recording the Live Event
Once the software and system are ready, you’re set to capture your favorite live-streamed match.
Launch Early
Join the stream 5–10 minutes before kickoff or puck drop. Early setup ensures you can verify volume levels and connection stability. If using iTop’s Schedule Recording, you can even automate start and stop times — perfect for long tournaments.
Start Recording
Click the REC button to begin. A short countdown allows you to prepare before the recording starts. Avoid switching applications during recording; keep your cursor off the stream window unless needed.
To monitor progress, iTop Screen Recorder provides an unobtrusive toolbar displaying elapsed time, pause controls, and frame indicators.
During Recording
Keep an eye on performance indicators. If you experience lag or buffering, reduce resolution or pause briefly to clear cache. Avoid unnecessary multitasking — screen recording is resource-intensive.
For long games (two hours or more):
- Enable Auto-Split Recording to break files into manageable segments.
- Keep your PC plugged in to avoid power interruptions.
- Disable system notifications to prevent pop-ups during key moments.
Stop Gracefully
Once the match ends, press Stop Recording. Wait until iTop Screen Recorder finalizes the file before exiting. This ensures the video isn’t corrupted or partially written.
Rename your recording immediately — e.g., Hockey_2025-10-20_TeamA_vs_TeamB.mp4 — and store it in a designated folder for easy access.
4. Reviewing and Editing the Recording
Capturing the event is only half the process. Post-production adds polish and structure to your recording, especially if you plan to analyze or share highlights.
Playback and Quality Check
Open the saved video in a media player. Verify that:
- The video is complete and smooth
- Audio is synchronized
- There are no interruptions, stutters, or resolution changes
Edit Highlights or Trim Footage
iTop Screen Recorder includes a built-in Video Editor that allows you to:
- Trim unwanted segments (ads, breaks, or commentary gaps)
- Add subtitles, titles, or watermarks
- Merge clips for highlight reels
- Insert timestamps for play analysis
These tools are ideal for sports analysts or fans who want concise highlight packages rather than full matches.
Compress and Export
High-definition videos can be large. Use iTop Screen Recorder’s compression feature to reduce file size without losing noticeable quality. This makes sharing easier via cloud or messaging platforms.
5. Optimizing for Sports-Specific Challenges
Recording live sports is different from recording a meeting or tutorial. Motion, commentary, and dynamic overlays require special attention.
Maintain Smooth Frame Delivery
Sports footage involves fast panning and quick transitions. Stick with 60 fps whenever possible, and ensure a bit-rate high enough (8–12 Mbps for 1080p) to avoid pixelation.
Audio Synchronization
Nothing ruins a recording faster than delayed commentary. Monitor sync during test captures, and if needed, adjust audio buffer settings in iTop’s preferences.
Avoid Network Instability
If your stream buffers or fluctuates, your recording will reflect those interruptions. To minimize this:
- Use a wired Ethernet connection instead of Wi-Fi
- Close other bandwidth-intensive apps
- Start your recording a minute early to allow buffering to stabilize
Conclusion:
Recording live-streamed sports events isn’t just about pressing “Record.” It’s about system preparation, software optimization, and responsible use. By keeping your desktop organized — a clean workspace, properly placed widgets, and stable wallpaper — you ensure maximum efficiency. Leveraging the powerful capabilities of iTop Screen Recorder lets you record in crystal clarity, edit seamlessly, and manage files effortlessly.
Whether you’re preserving an unforgettable hockey game, analyzing a soccer match, or curating highlights from a tennis tournament, this workflow ensures every moment is captured with precision and professionalism.